The mysterious "Cloud"
Search

Pittsburgh Tech Guy

Phone: 412-256-8674

Email: pghtechguy@hotmail.com

Skype: pghtechguy on Skype


How to Backup your computer online for free

Welcome to the Pittsburgh Tech Guy!  Your local source for good, dependable technical support and information!  Keep up with the latest Tech news here!

Remember, all home computer analysis are free!

Entries by Thom McClain (1382)

Monday
Dec042017

How To Resize An Image To A Desktop Wallpaper

Wallpapers come in different sizes. If you like an image and it’s a good, HD image you can use it on a large screen even if it isn’t the right size. Windows can stretch an image so that it fills the screen and normally, it does a good job. Sometimes though, it doesn’t work and the image is cut off at the wrong end. The best course of action is to resize an image to fit your desktop. Here’s the best way to resize an image to a desktop wallpaper.

Find Your Screen Resolution

Before you resize an image to a desktop wallpaper, you need to know what size it should be. This isn’t a one-size fits all deal. You’re cropping and resizing an image for your screen. It’s a custom job so use your screen’s resolution.

Open the Settings app and go to the System group of settings. Select the Display tab and look at the value set under the Resolution dropdown. This is the size an image should be to fit your screen perfectly.

Resizing An Image

For this, we’re going to use an image by Unsplash user John Fowler @wildhoney. This image is 4288x4800px. The width is less than the height so it’s a poor fit for the average monitor that is usually landscape oriented. There are two ways to treat an image like this; resize, or crop, or both.

You can resize the image and change it’s width to 1920px. The height will change proportionally and it will not be 1080px. When you set it as your wallpaper, some of it will still be cropped out. If this is acceptable, use IrfanView to resize the image and set it as your wallpaper.


Given the dimensions of this particular image, at least half of it will be cropped out even after you’ve resized it to fit the width of your screen. There’s no way around this but what you can do is crop the image so that it includes the better parts of the image you’re using.

Again, you can use IrfanView to crop it. Open the resized image in IrfanView and cut out the part that you want to include in the background. Remember to trim only from the top and bottom if you’ve already resized it to fit the width of your screen. Save the cropped image and then set it as your desktop wallpaper.

You can use this same method to crop and resize an image for your phone but you will need to get the size absolutely right. Not all phones will fit an image on the screen so it’s best to crop and resize it to fit.

Monday
Dec042017

How To Easily Back Up & Transfer Data Between iPhones For Free

Data management for iPhones is something iTunes holds a monopoly over. Unfortunately, iTunes isn’t getting better. The previous version has done away with the App Store and app downloads. The iTunes back-up is a single file; you can’t extract specific information from it, not unless you’re willing to pay for an app that can do it for you. EaseUS MobiMover can transfer data between iPhones. The app can transfer data between iPhones but it can also transfer it between an iPhone and a computer, and vice versa. It’s free to use unlike other apps in this niche and it supports the latest version of iOS. The app is available for Windows and it is compatible with the iPhone 8 and the iPhone X.

Data Transfer Modes

EaseUS MobiMover has four data transfer modes; transfer to current device, transfer to another device, transfer to computer, and custom.

The ‘Transfer to this device’ mode lets you transfer music, videos, and photos to your iPhone. You can transfer individual files, or select an entire folder of music or photos to transfer to your phone. It beats the full back-up you need to take with iTunes and you don’t have to sync your entire library every time you add a new file.

The ‘Transfer to other device’ mode lets you connect two iPhones and transfer data from one phone directly to the other. You don’t have to back up data and then copy it over to your second phone. Additionally, unlike the back-up that you get with iTunes, you can choose what data to transfer to your second phone.

For example, if you want to keep photos on your old phone, you can choose not to transfer them to the second phone.

The ‘Transfer to computer’ mode lets you move music, images, videos, ebooks, ringtones, etc to your computer.

Finally, the Custom mode gives you the option to export individual items, e.g., a single text or iMessage, or a contact to your computer. You can choose multiple items and back them up.

The time the app takes to transfer data depends on how much data there is to transfer. EaseUS MobiMover is reasonably fast but if you have a lot of videos and photos, and a large music library, transferring them all can take some time.

Disable iCloud

While EaseUS MobiMover works great, it does require that you disable iCloud when you transfer data. You don’t have to disable it completely; just for the items you want to transfer. For example, if you want to transfer your contacts to your computer, you have to disable iCloud back-up for the Contacts app on your iPhone. If you don’t, the transfer will fail. You can enable iCloud again once the transfer is complete, no harm done.

The app can detect when you disable iCloud for data. All you have to do is refresh the items within the app. There’s no need to disconnect and reconnect your device.

Viewing Exported Items

The music, photos, and videos are exported in their original format and quality. You can open them with your default app for the respective file type. The messages are formatted so that they’re easier to read. The number that sent you the message is also included with the exported text. It’s saved as an HTML file, as are your notes, reminders, etc. and you can view them all in your browser.

Deleting & Editing Data

EaseUS MobiMover is at its core a data transfer app but it has additional features that help manage data on your iPhone. Noteworthy is the deleting and editing feature that works with contacts and photos, among other things.

With EaseUS MobiMover, you can edit an existing contact on your phone and add additional details to it including another phone number, email, and even a note.

The app also has a built-in photo viewer that you can use to view the photos in your camera roll or photo stream. The photo viewer is basic but it lets you rotate photos, and delete them enmasse. If your camera roll is clogged up and your iPhone is taking too long to delete the photos in it, you can use EaseUS MobiMover to delete the photos easily and quickly.

A Simple, Free Solution

EaseUS MobiMover doesn’t do anything new, or unique. There are plenty of apps that can transfer data between iPhones but EaseUS MobiMover does it simply. Most apps that offer data transfer get so lost in incorporating multiple features that they neglect the UI. EaseUS MobiMover is easy to use regardless how good or bad you are with technology. It’s also worth noting that the app doesn’t make it easy to accidentally erase data.

EaseUS MobiMover has a paid version but you only need it if you plan to use the app commercially. If you need to use it on a home computer, it’s free forever. The app doesn’t limit you to using only a few devices so you can use it to manage every iOS device you have at home.

Saturday
Nov252017

Google Released a Tool That Lets You Backup Your Entire Computer

After a bit of a delay following its big announcement last month, Google has finally released a tool that allows you to use its free cloud storage to backup all of the files on your Mac or Windows computer.

The new Backup and Sync feature lets you safely store content from your computer's internal hard drive, or from other devices like memory cards or USB devices, in Google Drive.

It's an easy and efficient way to protect your files and photos by backing them up, as long as they're in Google Drive and Google Photos. The tool will recreate your desktop folder ecosystem directly in Drive instead of having to create an entirely new network of folders.

"Just choose the folders you want to back up, and we'll take care of the rest," Google wrote on its blog.

googleWhile free Drive accounts only offer 15 GB for Backup and Sync, you can pay for more storage to ensure all of your files are backed up.
Backup and Sync is available for download through Google Drive and Google Photos.

Saturday
Nov252017

How to Tell If Your Login or Passwords Have Been Stolen

Step 1: Do Some Googling

But given the millions of people affected by major security breaches, how can you tell if your specific information has been leaked? And what can you do about it?

You could start by running a Google search to see whether any site you use has suffered a leak. But that's hit or miss, time-consuming, and even if you find reports that one of them has been hacked, that doesn't mean that your information was actually compromised.

Thankfully, the internet tends to fix as many problems as it causes (in the video below, imagine Homer saying "internet" instead of "alcohol" and you get the idea). Here are some tips to help you stay on top of cybersecurity.

Step 2: Find Out if You've Been Leaked

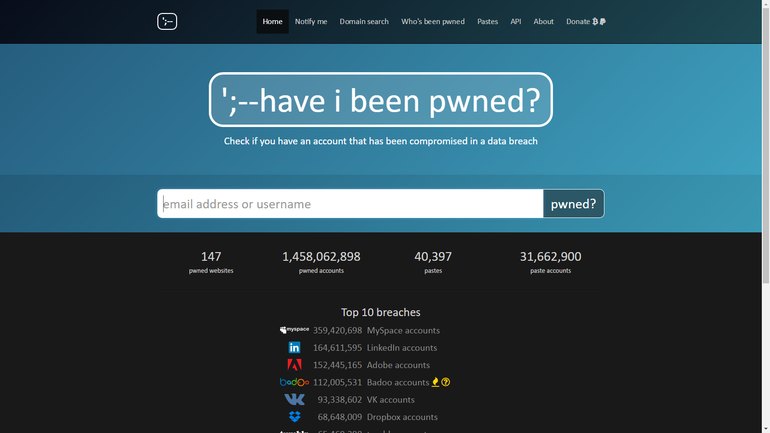
The simplest way to determine whether your information has been leaked is to visit haveibeenpwned.com. Yeah, it has a weird name (pwned comes from hacker jargon that refers to "being owned"), but it works, it's free, and it doesn't require you to sign up for anything.

...

Just type in your username or email address, and the site quickly searches the list of known breaches, reporting back to you whether you've been compromised and (if so) through which site. You don't need to provide any passwords or other sensitive information to this service.

Step 3: Double Check at LeaskedSource

Another option is to use leakedsource.com. Both sites do more or less the same things, but they provide dual coverage—so if one site misses something, the other may not.

Step 4: Change Your Passwords Immediately

The first thing you should do is to change your compromised password right away.

Next ask yourself, "Did I reuse that same password at any other sites?" If so, change the password there as well—and this time use a different password at each site.

One of the best rules of online security is, Make every password unique. That way, if one site is compromised, your other logins remain safe.

Juggling dozens of different logins can be a major inconvenience, of course. Thankfully, you can turn to a program designed to manage multiple passwords in a convenient way. For more on this topic, check out Choose a Password Manager to Protect Your Security.

Here's a little tip: If you use a password manager like LastPass or Dashlane (and you really, really should) these programs can warn you if you're re-using then same password on multiple sites.

Step 5: Make Yourself Safer for the Next Breech

When creating a new password, follow the advice of security experts to ensure that you choose the most secure options available.

Your new password should be 12 characters long. It should contain letters, numbers, and symbols (such as ! or ?), and it should not refer to any other information that hackers might easily access or guess. For example, don't base the password on your name, address, phone number, or pet's name.

And once you devised a secure password, let a password manager program remember it and its fellow passwords from your other login sites.

After changing your passwords, occasionally revisit haveibeenpwned.com (or a similar site) to confirm that your login information remains secure. By staying vigilant and working to understand the threat, you can give yourself maximum protection against cybercrime.

Saturday
Nov252017

Your iPhone Automatically Remembers All Your Passwords for You

Passwords protect your personal information from being stolen, and that's pretty important. Some websites allow you to create passwords that are easy to remember, while others require the works: upper case letters, symbols, numbers, eight characters in length, and your first born child. OK, maybe not the latter.

That's a lot to remember, especially considering the number of websites you visit each day that require passwords. Well, as it turns out, you don't ever need to remember your passwords, because your iPhone does it for you.

If you weren't aware of this feature before, get ready to have your mind blown.

Here's how to find all your passwords you've ever created:

  • Go to your Settings
  • Click on Accounts & Passwords
  • Click on App & Website Passwords
account
credit: Jill Layton

You'll be asked to enter your Touch ID to access a page that securely holds the logins and passwords for every website you've created them for. There's even a search button to help you find what you're looking for quicker.

So, you don't need to deal with sending a request for a forgotten password ever again—they're all literally right at your fingertips.

Thursday
Nov092017

How To Delete A User In Windows 10

Windows 10, like its predecessors, lets you add multiple users to a single system. Windows 10 does try to get you to connect your Microsoft ID to a user account but you can add local users as well. In fact, you can use Windows 10 as a local user and not miss out on too much. That said, when you no longer need a user account on your system, you shouldn’t just leave it as it is. A user account takes up space. If an account is sitting idle then you’re basically wasting that space. Here’s how you can delete a user in Windows 10.

Delete A User In Windows 10

Open the Settings app and go to the Accounts group of settings. Select the Family & other people tab. Here, you will see a list of all users you’ve added to the current system.

Select the user account you want to remove and click the ‘Remove’ button that appears under it. You might be prompted to enter the administrator password. If the Remove button doesn’t appear, or it’s greyed out/inactive, sign in from the administrator account and then try it.

You will get a prompt telling you that all data stored in the user account will be deleted. This includes everything in the documents, photos, music, etc., libraries for that particular user. It will not delete anything else and your own account will not be affected. Additionally, nothing on your other drives will be deleted. If a user saved a file to the D drive, it will still be there. Only files in the user’s own libraries will be deleted.

Click Delete account and data to remove the user. Once you do this, there is no going back. The data cannot be recovered.

Limitations

You cannot delete all user accounts from Windows 10 at once. If you’re looking to create a new, fresh user for yourself, and get rid of your old user account, you need to first create the new account and transfer admin rights to it. You can’t be signed in to the user account that you’re trying to delete.

If you’re looking to delete your current account but you don’t want to or don’t have the option to add a second user, your only recourse is to reset Windows 10. You will have the option to keep all your files but your apps will be gone and you will start out with a fresh Windows installation and a new account.