The mysterious "Cloud"
Search

Pittsburgh Tech Guy

Phone: 412-256-8674

Email: pghtechguy@hotmail.com

Skype: pghtechguy on Skype


How to Backup your computer online for free

Welcome to the Pittsburgh Tech Guy!  Your local source for good, dependable technical support and information!  Keep up with the latest Tech news here!

Remember, all home computer analysis are free!

Wednesday
Jun142017

Use your TV as a computer monitor: Everything you need to know

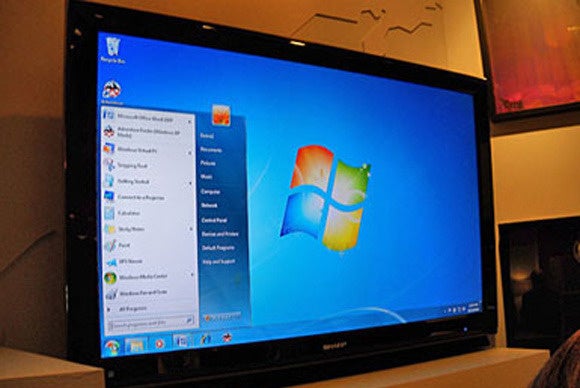
A couple of months ago, I took a good, hard look at my dual-screen setup and thought, hmmm, maybe I should get another monitor. A bigger monitor. Then, after an hour or two of researching 27-inch monitors online, I walked into my living room and was struck with a brilliant idea: Maybe, instead of purchasing an entirely new monitor, I should just move my 32-inch HDTV into my office and call it a day.

Bigger is better, you know, and this way I wouldn’t have to drop a couple hundred bucks on a new piece of equipment. But just because HDTVs look a heck of a lot like computer monitors doesn’t necessarily mean they can replace computer monitors. Or does it? Here’s what you need to know if you’re thinking about sticking an HDTV on your desk.

Will it even work?

The short answer: Yes, although you may need a special cable depending on what type of input/output ports you’re working with.

All modern HDTVs have HDMI inputs—some older HDTVs have DVI inputs instead—and some have VGA inputs for “PC use.” If your graphics card has an HDMI output, you’re good to go: Just use an HDMI cable to connect your PC to your HDTV. If your graphics card only has DVI outputs, I suggest snagging a cheap HDMI-to-DVI cable (like this one on Amazon) and plugging it into your HDTV’s HDMI input. Although some HDTVs (and some graphics cards) have VGA inputs/outputs, this is not the ideal choice—it’s an analog signal that will give you a far fuzzier, lower-resolution image than an HDMI or DVI signal.

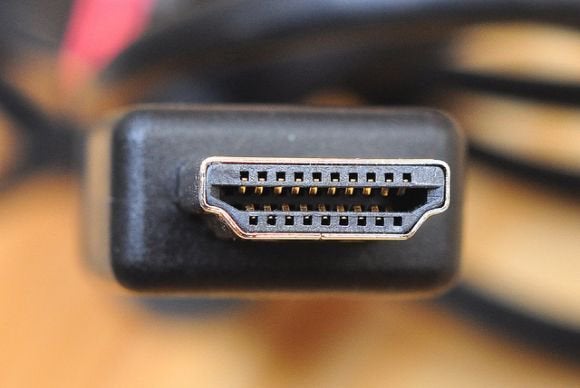
An HDMI connector.

If you’re setting up your HDTV as a second or third monitor, you may need to use your PC’s DisplayPort output, in which case you can purchase a DisplayPort-to-HDMI converter (like this one) and plug into your HDTV’s HDMI input. The main advantage to converting from DisplayPort is that HDMI and DisplayPort both carry sound as well as video—if you use DVI (even the digital version) or VGA, you’ll need to connect your PC’s sound to the HDTV or to external speakers separately.

Before you start using your HDTV as a monitor, you need to figure out whether your graphics card/integrated graphics is capable of outputting at the resolution of the HDTV. To do this, you’ll first need to find the resolution of the HDTV by consulting the manufacturer’s manual. Be aware that some HDTVs have non-standard resolutions. Then, find your graphics card’s maximum resolution by going to Control Panel > Display > Change display settings > Advanced settings > List All Modes. Find the resolution that matches your HDTV and select it.

Will it look good?

Maybe, but this depends on a number of factors, including what you want to use your HDTV monitor for. Most reasonably priced HDTVs top out at 1080p, or 1920x1080 resolution. On a 15.6-inch laptop screen, the Windows desktop at 1080p looks pretty darn good from a couple of feet away. On a 32-inch HDTV screen…not so much.

0212 primary

What’s important here is pixel density, or the number of pixels packed into one square inch of the screen. A 15.6-inch laptop screen has the same number of pixels as the 32-inch HDTV screen, but the laptop has a much higher pixel density (141.21ppi) than does the HDTV (68.84ppi). Thus, the laptop’s screen will appear clearer, sharper, and more detailed than the HDTV’s screen when viewed from the same distance. The importance of pixel density decreases with viewing distance; that’s why the iPhone’s “Retina” screen has a density of 326ppi, while the MacBook Pro’s “Retina” screen has a density of just 227ppi.

What this means for you is that a larger but less pixel-dense HDTV screen will display text, icons, and images as blurry and difficult-to-read if you’re sitting at a normal viewing distance—a couple of feet—from your computer.

If you plan on using your HDTV monitor to do anything other than watch Netflix or play games, you’ll want an HDTV with a higher pixel density (I like to shoot for at least 80ppi, which means no larger than a 27-inch screen at 1080p) for comfortable viewing. Or just hang it on the wall rather than plopping it on your desk.

Speaking of gaming, if you want to use your HDTV monitor to play games, there’s another factor you’ll need to take into consideration: input lag.

Input lag is the delay between movement you make on your input device (in this case, your mouse) and what displays on your screen. While many computer monitors prioritize minimal lag times, many HDTVs do not, and prioritize (laggy) video processing instead. But those extra milliseconds will definitely make a difference when you’re playing a high-stakes FPS.

DisplayLag has a pretty good database of input lag times that you can sort by display type—you want to pick an HDTV with a lag time of no more than about 40 seconds. If you run in to input lag problems while gaming, try activating your HDTV’s “Game mode” setting if one is available.

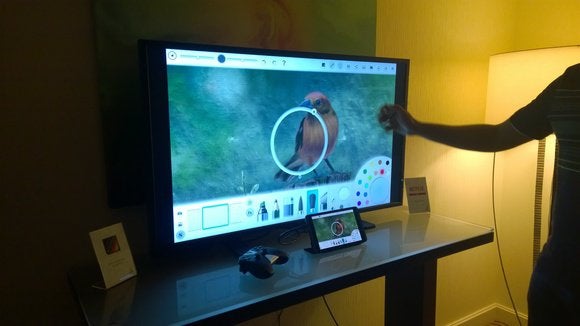
Nvidia Shield tablet Mark Hachman

Is it worth it?

If you’re looking to get the best bang for your buck, an HDTV isn’t necessarily going to save you money over a monitor. In fact, if you’re purchasing a new display, I recommend sticking with the tried-and-true computer monitor. For one thing, smaller, cheaper HDTVs are typically 720p resolution, not 1080p, while similarly priced monitors will almost always be 1080p. So if you’re looking for something under 27 inches, an HDTV will probably be more expensive and lower-resolution.

If you’re looking for something larger than 27 inches, remember that pixel density decreases significantly with every few inches you gain, and there’s a reason HDTV-makers suggest sitting several feet away from their displays. If you need a display that will multitask as an up-close work/email display as well as a movie/entertainment display, you’ll want something with a high enough pixel density that text won’t be a pain to read. 

There is an ideal situation in which the HDTV-as-monitor shines, though.

If you want to add an extra display to a single- or multi-display setup for entertainment—say, so you can watch Netflix or Twitter while you write articles, or so you can play Skyrim on a 60-inch screen—then an HDTV can be a very capable (and cool!) monitor replacement. Bonus points if you happen to have an extra HDTV lying around, or if you can pick one up for dirt-cheap.

Tuesday
Jun062017

A couple of web browsing tricks....

Automatically add www. and .com to a URL You can shave off a couple of seconds typing in a URL by simply click CTRL + Enter after you type the name of the site. Need .net instead of .com, press CTRL + Shift + Enter instead.

Jump to address bar There are a number of ways to jump right to the address bar from anywhere in browser. Pressing CTRL + L, F6, and ALT + D all accomplish this goal.

Bring back a closed tab We covered this already, but it's super useful. Accidentally closed a tab? Simply press CTRL + Shift + T to reopen the most recently closed tab and get back to what you were doing.

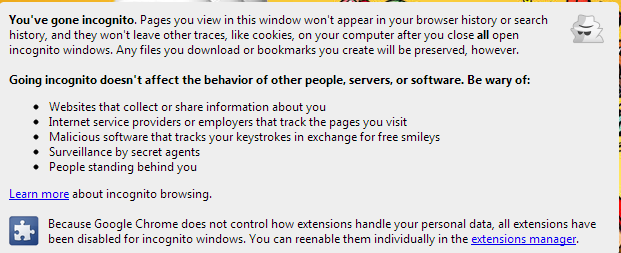
Use private browsing The uses for not having cookies and history saved are obvious for certain activities, you know, like shopping for gifts on a shared computer (of course!). Pressing CTRL + Shift + N will launch a new private in Chrome, CTRL + Shift + P will do it in Firefox and Internet Explorer.

Cycle through open tabs Pressing CTRL + TAB while in a browser will flip between each one. This can be much faster than moving the mouse and clicking on a tab. CTRL + NUM (1, 2, 3, 4, n..) will also take you to certain tab in that numeric order.

Tuesday
Jun062017

External drive died? Your data may still be easy to recover

How can I recover a dead drive, you say? Well, external drives utilize what's called a bridge board to handle communications between the USB/FireWire/Thunderbolt controller and the native SATA that the drive understands. Sometimes, it's this bridge board that fails, while the drive inside remains perfectly usable.

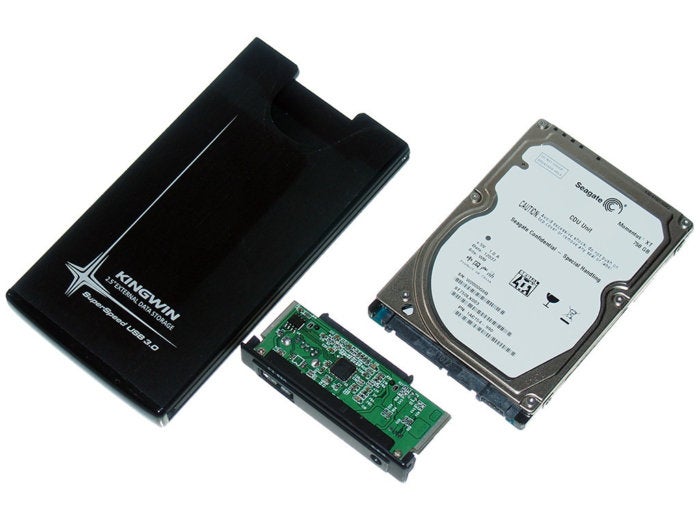
parts 100478529 orig PCWorld

A third-party Kingwin 2.5-inch drive enclosure with the bridge board and hard drive removed. If you're drive is this type, you're in luck--drives from major vendors can be extremely difficult to disassemble.

To find out whether the drive is still viable, you'll need to transplant it--that is, remove it from the case, then attach it to the SATA controller of a desktop PC, or the spare 2.5-inch bay of a laptop if you happen one of those (and the drive is a 2.5-inch type and thin enough). If you want it to remain external, you can buy a new enclosure and use it in that.

Screws or demolition

With most third-party, and some 3.5-inch major vendor enclosures, it's easy to remove a drive. Simply remove a few screws to open the case, and remove a few more to detach the drive. At worst, you might have to pry off a few rubber feet to reveal the screws. Alas, especially with major vendors' 2.5-inch external drives, you might wind up prying apart glued plastic pieces to get to the hard drive itself.

Before you indulge in mayhem, however, make sure there aren't any pry- or pop-off panels that hide screws, and search the vendor's site carefully for instructions. You're unlikely to find them with the big-name drives, as what you're about to do is a warranty-voiding procedure, but at least give it a try. You can also check YouTube to see if someone else has plotted your course for you.

If you have no luck with instructions or figuring out a non-destructive method to open the drive, you'll need to resort to X-acto knives and spudgers (dedicated prying tools). First try running a razor or knife along a seam, the use a spudger to try and pry it apart. It may give way politely, but more likely you'll have to use significant force. Remember that the drive is useless unless you can remove it, so you may have to resort to brute force. Just don't hurt yourself, or the relatively fragile drive inside.

Once removed from the enclosure, attaching the drive to a PC is simple. Just dig up, or buy a SATA cable, open the PC case, and attach the drive using a SATA cable to a free SATA port. There are almost always spare SATA power leads coming off the power supply. Find one and attach it to the drive. Power up the PC and if the drive is okay, it will spin up and appear in Windows Explorer. If it doesn't, check Disk Manager to see if it's a foreign file system. You might have to boot using a live version of Linux, or use a Mac if it's EXT or HFS.

If the drive spins up (you'll hear it if it does--put your ear next to it.) but then spins down, or doesn't appear under Windows or Disk Manager, you have one more trick you can try--freezing the little sucker. This can keep a wonky bridge or controller chip alive long enough to pull off a few vital files. I've succeeded with this trick multiple times, and failed a lot more.

If all else fails

If none of those tricks work, it's time for data recovery service. Assuming the data is that important and can't be replaced. Services vary in cost from expensive to very expensive, and are available from most electronics and office box stores. You can also find services such as Drive Savers online.

Note: Some drives, such as Seagate's Backup Plus Fast, run two drives in RAID 0 where data is divided between the drives. You'll need a recovery program such as R-Studio to recover data from a setup like this.

Tuesday
Jun062017

Google will block bad ads (even its own) with a filter built into Chrome

While Google has long offered a way to block pop-ups in Chrome, it’s never been a feature that's been very easy to find. To turn it on you’ll need to dig deep into the settings, and most people who use the browser probably don’t even know it’s there. But now Google is finally getting serious about annoying ads.

And that includes their own.

In a blog post, Sridhar Ramaswamy, senior vice president of ads and commerce, outlined the company’s new strategy for dealing with ads as part of an effort to build “a better web for everyone.” He explains that Google has joined the Coalition for Better Ads, an industry group that also includes Facebook, News Corp, and Unilever, to “provide clear, public, data-driven guidance for how the industry can improve ads for consumers.”

And that starts with the way Chrome displays ads. As Ramaswamy explains, “In dialogue with the Coalition and other industry groups, we plan to have Chrome stop showing ads (including those owned or served by Google) on websites that are not compliant with the Better Ads Standards starting in early 2018.” It’s unclear whether the new ad blocker would be an option that user could disable or a feature built into the Blink rendering engine that powers the browser.

A separate report in The Wall Street Journal states that Google will give publishers “at least six months” to prepare for the change. In addition to filtering out rogue ads that degrade the experience, the publication says the setting will “prevent all ads from appearing on websites that are deemed to provide a bad advertising experience for users.”

According to the Journal, Google is pitching the feature as more of a filter than a blocker, much like the pop-up window blocker that already exists in the browser. However, while users need to explicitly opt into that feature, the new ad blocker would be turned on by default for all users.

The story behind the story: It’s no secret that Google is one of the richest companies in the world, and the majority of its revenue comes from ads. But while it might seem anti-competitive and a little shady for the biggest ad supplier in the world to be adding an ad blocker to its own browser, this could have good implications all around.

Chrome users know that there are several ad-blocking extensions available in the Chrome web store, but most of them take an all-or-nothing approach, which obviously affects Google’s bottom line. By weeding out troublesome and burdensome ads, including those from the Google-run Ad Exchange, it could create a better experience for all, regardless of whether you already run an ad blocker. And it’s not just Chrome that could benefit from this push. As a member of the Coalition for Better Ads, Google is committing to improving the delivery and presentation of ads, something we can all agree is sorely needed.

Wednesday
May172017

Yes, when you take your computer to the Geek Squad, they snoop through your files

Recent article in the Washington Post shows what many of us tech guys already knew.  When you take your computer to Best Buy to get fixed, you can be pretty sure that whatever man/woman is looking at it, they probably will be looking through your personal files.  They are obligated to report anything criminal they find (ie. Child porn).  This I have no problem with, but the idea that they search to begin with is bothersome.  When fixing your computer, there is no reason for them to go through your personl files, but many will do it for kicks.  Just thought you should know that when you take your computer to those services, you might want to remove anything personal you have, as there is nothing preventing a corrupt technician from copying your personal pictures, tax returns and the like from your system.   There are several options you have for protecting your information in these situations.  I will update those options in another post. 

Sunday
May072017

Siri can actually tell you what plane is flying above your head!

Siri can do more than set reminders or read emails to you, such as identifying which planes are currently flying above you.

When we first covered this tip way back in 2011, you had to use a specific phrase involving Wolfram Alpha, the service that Apple uses with Siri, in order for it to work.

Since then, Apple has streamlined the command along the way.

The next time you see planes overhead and are curious where it's heading, activate Siri and ask "What planes are overhead?"

That's it. A few seconds later a chart detailing the airline, flight number, altitude, and degrees off the horizon will show up. Another chart goes on to list the type of airplane along with slant distance, or how far away the plane is from you.

At the bottom of the chart is a small disclaimer, stating the data is based on a projection of where the plane should be using delayed data. In other words, if the plane isn't exactly where Siri tells you it is, it's likely close.